
|
|
|
|
DiskPulse Server Configuration
DiskPulse Server provides a variety of configuration options allowing one to easily integrate the product into a user-specific network environment. In order to open the main options dialog, press the 'Options' button located on the main toolbar. 
Configuring Custom User Name, Password and Ports The DiskPulse client GUI application requires users to login with a DiskPulse user name and password. The default user name and password is set to admin/admin. In addition, DiskPulse Server provides the ability to set a custom user name and/or password for the DiskPulse client GUI application and the command line utility, which may be used to automate configuration and management tasks. In order to set a custom user name and password, open the main options dialog, select the 'Server' tab, specify a new user name and password and press the 'Save' button. 
DiskPulse Server uses the TCP/IP port 9120 as the default server control port and the TCP/IP port 80 as the default web access port. Sometimes, these ports may be in use by some other software products or system services. If one or both of these ports are in use, DiskPulse Server will be unable to operate properly and the user needs to change the DiskPulse server control port and/or web access port. In order to set a custom server control port and/or web access port, open the main options dialog, select the 'Server' tab and enter a custom server control port or web-access port to use. If the DiskPulse server should be controlled through the network, make sure the server control port and the web access port are open in the server's firewall. DiskPulse Server Report Management In addition, DiskPulse Server allowing one to customize the following of report management options:

Configuring E-Mail Server In order to be able to send E-Mail notifications, open the main options dialog, select the 'E-Mail' tab, enable E-Mail notifications, enter the SMTP server host name, port, user name, password and the source E-Mail address to use to send E-Mail notifications. Optionally, enable the secure SMTP connection mode and select an appropriate security algorithm. 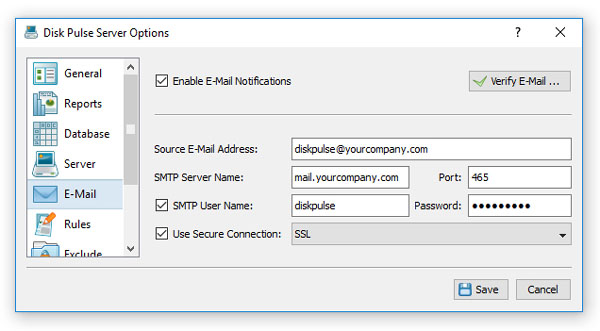
Configuring SQL Database DiskPulse allows one to save disk change monitoring reports in an SQL database. In order to enable SQL database reports, open the main options dialog and select the 'Database' tab. On the SQL database configuration tab enter the ODBC data source, user name and password to use to save reports to the SQL database. 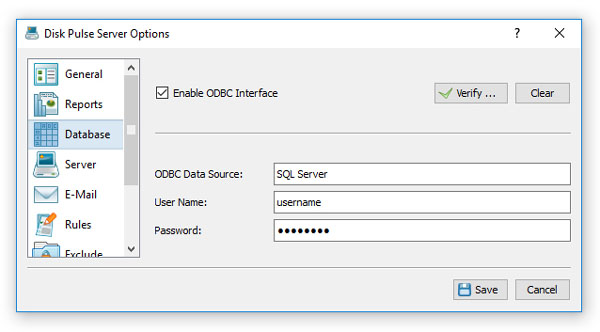
|
DiskPulse News
|


